Xorg.conf for three screen setup

After some extended reseach I finally succeeded in getting my server setup with three screens running. My system currently consists of a radeon HD6570 with two Lenovo L171 and a Geforce 6200 with a Lenovo L171p. The monitors are capable of showing a resolution of 1280×1024 on a 17″ screen and the complete setup is using Xinerama.


Section "ServerLayout"
Identifier "three screen setup"
Screen 0 "screen-links" 0 0
Screen 1 "screen-mitte" RightOf "screen-links"
Screen 2 "screen-rechts" RightOf "screen-mitte"
InputDevice "Mouse0" "CorePointer"
InputDevice "Keyboard0" "CoreKeyboard"
Option "Xinerama" "1"
EndSection

Section "Files"
ModulePath "/usr/lib/xorg/modules"
FontPath "/usr/share/fonts/X11/misc"
FontPath "/usr/share/fonts/X11/cyrillic"
FontPath "/usr/share/fonts/X11/100dpi/:unscaled"
FontPath "/usr/share/fonts/X11/75dpi/:unscaled"
FontPath "/usr/share/fonts/X11/Type1"
FontPath "/usr/share/fonts/X11/100dpi"
FontPath "/usr/share/fonts/X11/75dpi"
FontPath "built-ins"
EndSection

Section "Module"
Load "glx"
EndSection

Section "InputDevice"
Identifier "Keyboard0"
Driver "kbd"
EndSection

Section "InputDevice"
Identifier "Mouse0"
Driver "mouse"
Option "Protocol" "auto"
Option "Device" "/dev/input/mice"
Option "ZAxisMapping" "4 5 6 7"
EndSection

Section "Monitor"
Identifier "monitor-links"
VendorName "lenovo"
ModelName "L171 links"
EndSection

Section "Screen"
Identifier "screen-links"
Device "radeon-links"
Monitor "monitor-links"
DefaultDepth 24
SubSection "Display"
Depth 24
Modes "1280x1024"
# ViewPort 0 0
# Virtual 1280 1024
EndSubsection
EndSection
Section "Monitor"
Identifier "monitor-mitte"
VendorName "IBM"
ModelName "L171p mitte"
EndSection

Section "Screen"
Identifier "screen-mitte"
Device "radeon-mitte"
Monitor "monitor-mitte"
DefaultDepth 24
SubSection "Display"
Depth 24
Modes "1280x1024"
# ViewPort 0 0
# Virtual 1280 1024
EndSubsection
EndSection

Section "Monitor"
Identifier "monitor-rechts"
VendorName "lenovo"
ModelName "L171 rechts"
EndSection

Section "Screen"
Identifier "screen-rechts"
Device "nouveau"
Monitor "monitor-rechts"
DefaultDepth 24
SubSection "Display"
Depth 24
Modes "1280x1024"
# ViewPort 0 0
# Virtual 1280 1024
EndSubsection
EndSection
Section "Device"
### Available Driver options are:-
### Values: : integer, : float, : "True"/"False",
### : "String", : " Hz/kHz/MHz",
### : "%"
### [arg]: arg optional
#Option "SWcursor" # []
#Option "HWcursor" # []
#Option "NoAccel" # []
#Option "ShadowFB" # []
#Option "VideoKey" #
#Option "WrappedFB" # []
#Option "GLXVBlank" # []
#Option "ZaphodHeads" #
#Option "PageFlip" # []
#Option "SwapLimit" #
#Option "AsyncUTSDFS" # []
#Option "AccelMethod" #
Identifier "nouveau"
Driver "nouveau"
BusID "PCI:24:7:0"
Screen 0
Option "DynamicTwinView" "FALSE"
EndSection

Section "Device"
### Available Driver options are:-
### Values: : integer, : float, : "True"/"False",
### : "String", : " Hz/kHz/MHz",
### : "%"
### [arg]: arg optional
#Option "Accel" # []
#Option "SWcursor" # []
#Option "EnablePageFlip" # []
#Option "ColorTiling" # []
#Option "ColorTiling2D" # []
#Option "RenderAccel" # []
#Option "SubPixelOrder" # []
#Option "AccelMethod" #
#Option "EXAVSync" # []
#Option "EXAPixmaps" # []
#Option "ZaphodHeads" #
#Option "EnablePageFlip" # []
#Option "SwapbuffersWait" # []
Identifier "radeon-links"
Driver "radeon"
BusID "PCI:1:0:0"
Screen 0
Option "ZaphodHeads" "DVI-1"
EndSection

Section "Device"
### Available Driver options are:-
### Values: : integer, : float, : "True"/"False",
### : "String", : " Hz/kHz/MHz",
### : "%"
### [arg]: arg optional
#Option "Accel" # []
#Option "SWcursor" # []
#Option "EnablePageFlip" # []
#Option "ColorTiling" # []
#Option "ColorTiling2D" # []
#Option "RenderAccel" # []
#Option "SubPixelOrder" # []
#Option "AccelMethod" #
#Option "EXAVSync" # []
#Option "EXAPixmaps" # []
#Option "ZaphodHeads" #
#Option "EnablePageFlip" # []
#Option "SwapbuffersWait" # []
Identifier "radeon-mitte"
Driver "radeon"
BusID "PCI:1:0:0"
Screen 1
Option "ZaphodHeads" "DVI-0"
EndSection

msmtp – config

To add the capability of sending email from any host I decided to install msmtp-mta on any host that does not include a full email server. The config is done in the file: /etc/msmtprc

and here is the contents:
account default
host cubietruck.steppenwolf.de
auto_from on
maildomain steppenwolf.de
tls on
tls_trust_file /etc/CA/cert.pem

rsync setup for client backup

I am using rsync for keeping my photos on the mobile phone in sync with my server. The complete system is growing and growing and the actual state is able to sync photos, books, music and movies. And I also wrote a very limited simple interface to show the contents on the web after syncing. Photos are stored in the server in a date-oriented form. The php script to handle the files on the server side may be found here.
The app is just installed from google play (https://play.google.com/store/apps/details?id=eu.kowalczuk.rsync4android&hl=en). Follow the instructions to generate a key and copy the public key to the server ~/.ssh/authorized_keys – possibly you need to add the key to already stored keys in your authorized_keys file

The setup in android should state the following options:

rsync -vHrltD --exclude=thumbnails --chmod=ug+rwx,o-rwx --perms -e "ssh -y -p 22 -i "mobile@:BackupFromMobile/pictures

for the other folders like:

  • pictures
  • ebooks
  • music
  • whatsapp
  • movies
  • the same settings apply.

    drraw – create new graph

    Recently I switched to collectd for keeping track on long term variantions within my little server landscape. Even that munin was less pain to install and initiate the burden for the simple servers I use are much too high. So something smaller and easier to maintain was needed and I found collectd. Easy tool but without any graphing option. So I came across drraw for the visualization. Also a very simple tool with no overhead but also with a very limited documentation.

    Installation of collectd and drraw in Debian Linux is quit forward, so just use apt-get install and your done.

    Even the configuration of the plugins for collectd is easy. So finally I needed to switch to a centralized logging configuration using the following two options:

    collectd-server:

    <Plugin network>
    Listen “Server ip”
    </Plugin>


    collectd-client:

    <Plugin network>
    Server “server ip”

    </Plugin>


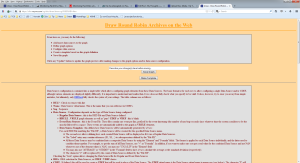
    For drraw to generate nice looking graphs it took me more effort.So first of all grant access to drraw.cgi in your webserver config and then start using it: http://localhost/cgi-bin/drraw/drraw.cgi

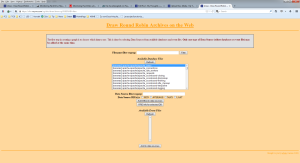
    drraw-start

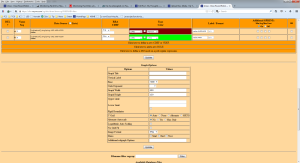
    Of course we need to create a graph now which includes as a first step to choose the rrd source

    drraw-create-graph

    The next step is to define the graph with lines, colors, caption, etc.


    drraw-create-graph-2

    drraw-create-graph3

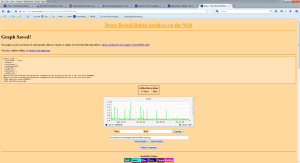
    And finally the graph must be saved in order to be kept for later view

    drraw-save-graph


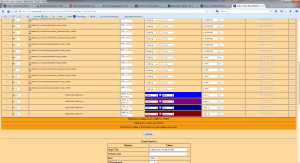
    And now some words about rpn (reverse polish notation) which is the system used by rrdtool to do the arithmetics. I just needed some additions but even this costs me some time to get right. Here is an excerpt:

    drraw-rpn-example

    to add four lines named a,b,c,d to one resulting line an CDEF must be created with the following data source: a,b,+,c,+,d,+


    create git repo and connect using eclipse

    In order to keep my software developments in line and keep access also from remote sides I decided to use git on one of my servers and use eclipse for the development itself. So to add or create a new repository I follow this steps:

    – create new directory: mkdir <repo>

    For convenience I use a naming as: repo-<section>-<subsection> (e.g. repo-php-project)

    – change to the newly craeted directory: cd <repo>

    – initailize a bare git repo: git init –bare

    This will fill in a repo with the administrative stuff inside but without any further details. Those will come with the first clone/commit.

    – clone the empty repo from within eclipse using the import function: Project perspective -> Import -> Git repository -> New Project

    This will create a new project within eclipse based on the newly created git repo.

    OpenVPN Multihost Config

    Here is my working access to my intranet via OpenVPN in MultiHost Mode. First the server config:

    and now the client config:

    ##############################################
    # Sample client-side OpenVPN 2.0 config file #
    ##############################################
    # Specify that we are a client and that we
    # will be pulling certain config file directives
    # from the server.
    client
    # Use the same setting as you are using on
    # the server.
    dev tun
    # Are we connecting to a TCP or
    # UDP server? Use the same setting as
    # on the server.
    proto udp
    # The hostname/IP and port of the server.
    remote olkn.myvnc.com 1194
    # Keep trying indefinitely to resolve the
    # host name of the OpenVPN server. Very useful
    # on machines which are not permanently connected
    # to the internet such as laptops.
    resolv-retry infinite
    # Most clients don't need to bind to
    # a specific local port number.
    nobind
    # Downgrade privileges after initialization (non-Windows only)
    user nobody
    group nogroup
    # Try to preserve some state across restarts.
    persist-key
    persist-tun
    # If you are connecting through an
    # HTTP proxy to reach the actual OpenVPN
    # server, put the proxy server/IP and
    # port number here. See the man page
    # if your proxy server requires
    # authentication.
    ;http-proxy-retry # retry on connection failures
    ;http-proxy [proxy server] [proxy port #]
    # SSL/TLS parms.
    ca /etc/openvpn/ca.crt
    cert /etc/openvpn/thinkpad.crt
    key /etc/openvpn/thinkpad.key
    # Verify server certificate by checking
    # that the certicate has the nsCertType
    # field set to "server". This is an
    # important precaution to protect against
    # a potential attack discussed here:
    # http://openvpn.net/howto.html#mitm
    ns-cert-type server
    # If a tls-auth key is used on the server
    # then every client must also have the key.
    ;tls-auth ta.key 1
    # Enable compression on the VPN link.
    comp-lzo
    # Set log file verbosity.
    verb 3

    Cups Print Server with remote printer driver

    To enable remote printing on a print server first setup the server with the correct printer drivers. In my case I had to install foo2zjs package in order to get my printer running. My network printer was than configured using the cups webinterface as socket://:9100 which is quiet specific for my HP printer.
    The remote printing must be configured using the following entries in cupsd.conf:

    Listen ip of printserver:631
    BrowseOrder Deny,Allow
    BrowseAllow From local net/255.255.255.0

    Order deny,allow
    Deny From All
    Allow From localnet /255.255.255.0

    on the client side please add the following directive to cupsd.conf:

    BrowsePoll ip of printserver :631

    In newer versions of cups the directive must be placed in cups-browsed.conf. The directive itself remains the same.

    Do not forget to start both servers in order to get the new directives working. On the client machine the remote printers should be available in the webinterface as newly added printers ready for jobs.

    In newer versions do not forget to restart the cups-browsed service also.

    apache config – wordpress

      wordpress

    ##############################################
    ServerAdmin olkn@gmx.net
    DocumentRoot /var/www/wordpress/
    DirectoryIndex index.php
    ProxyRequests off
    SSLProxyEngine On
    # ProxyHTMLLogVerbose On
    ProxyPreserveHost On
    ##############################################

    # problem with wordpress image upload
    Options FollowSymlinks
    Order Deny,Allow
    Allow from all
    AllowOverride All