rsync setup for client backup

I am using rsync for keeping my photos on the mobile phone in sync with my server. The complete system is growing and growing and the actual state is able to sync photos, books, music and movies. And I also wrote a very limited simple interface to show the contents on the web after syncing. Photos are stored in the server in a date-oriented form. The php script to handle the files on the server side may be found here.
The app is just installed from google play (https://play.google.com/store/apps/details?id=eu.kowalczuk.rsync4android&hl=en). Follow the instructions to generate a key and copy the public key to the server ~/.ssh/authorized_keys – possibly you need to add the key to already stored keys in your authorized_keys file

The setup in android should state the following options:

rsync -vHrltD --exclude=thumbnails --chmod=ug+rwx,o-rwx --perms -e "ssh -y -p 22 -i "mobile@:BackupFromMobile/pictures

for the other folders like:

  • pictures
  • ebooks
  • music
  • whatsapp
  • movies
  • the same settings apply.

    drraw – create new graph

    Recently I switched to collectd for keeping track on long term variantions within my little server landscape. Even that munin was less pain to install and initiate the burden for the simple servers I use are much too high. So something smaller and easier to maintain was needed and I found collectd. Easy tool but without any graphing option. So I came across drraw for the visualization. Also a very simple tool with no overhead but also with a very limited documentation.

    Installation of collectd and drraw in Debian Linux is quit forward, so just use apt-get install and your done.

    Even the configuration of the plugins for collectd is easy. So finally I needed to switch to a centralized logging configuration using the following two options:

    collectd-server:

    <Plugin network>
    Listen “Server ip”
    </Plugin>


    collectd-client:

    <Plugin network>
    Server “server ip”

    </Plugin>


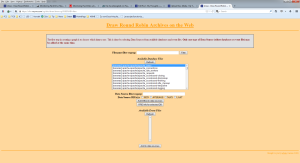
    For drraw to generate nice looking graphs it took me more effort.So first of all grant access to drraw.cgi in your webserver config and then start using it: http://localhost/cgi-bin/drraw/drraw.cgi

    drraw-start

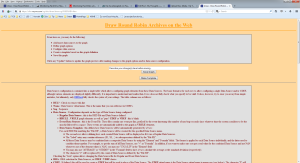
    Of course we need to create a graph now which includes as a first step to choose the rrd source

    drraw-create-graph

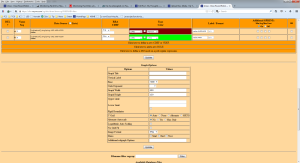
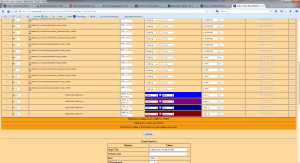
    The next step is to define the graph with lines, colors, caption, etc.


    drraw-create-graph-2

    drraw-create-graph3

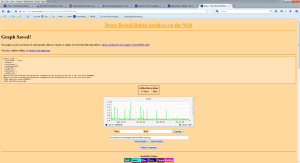
    And finally the graph must be saved in order to be kept for later view

    drraw-save-graph


    And now some words about rpn (reverse polish notation) which is the system used by rrdtool to do the arithmetics. I just needed some additions but even this costs me some time to get right. Here is an excerpt:

    drraw-rpn-example

    to add four lines named a,b,c,d to one resulting line an CDEF must be created with the following data source: a,b,+,c,+,d,+


    create git repo and connect using eclipse

    In order to keep my software developments in line and keep access also from remote sides I decided to use git on one of my servers and use eclipse for the development itself. So to add or create a new repository I follow this steps:

    – create new directory: mkdir <repo>

    For convenience I use a naming as: repo-<section>-<subsection> (e.g. repo-php-project)

    – change to the newly craeted directory: cd <repo>

    – initailize a bare git repo: git init –bare

    This will fill in a repo with the administrative stuff inside but without any further details. Those will come with the first clone/commit.

    – clone the empty repo from within eclipse using the import function: Project perspective -> Import -> Git repository -> New Project

    This will create a new project within eclipse based on the newly created git repo.

    Cups Print Server with remote printer driver

    To enable remote printing on a print server first setup the server with the correct printer drivers. In my case I had to install foo2zjs package in order to get my printer running. My network printer was than configured using the cups webinterface as socket://:9100 which is quiet specific for my HP printer.
    The remote printing must be configured using the following entries in cupsd.conf:

    Listen ip of printserver:631
    BrowseOrder Deny,Allow
    BrowseAllow From local net/255.255.255.0

    Order deny,allow
    Deny From All
    Allow From localnet /255.255.255.0

    on the client side please add the following directive to cupsd.conf:

    BrowsePoll ip of printserver :631

    In newer versions of cups the directive must be placed in cups-browsed.conf. The directive itself remains the same.

    Do not forget to start both servers in order to get the new directives working. On the client machine the remote printers should be available in the webinterface as newly added printers ready for jobs.

    In newer versions do not forget to restart the cups-browsed service also.

    linux read only root filesystem

    To create a read only root file system we need to know which processes access which files and which files must be accessible. So here is a list of files to take care of. Everything below /var is assumed of being accessible as it makes no sense from my point of view to restrict access for everything, which could nevertheless also be achieved by following this instructions.

    There are already some special file systems available in a standard linux installation, so we do not need to take care about:

    • /tmp – tmpfs
    • /sys – sysfs
    • /proc – procfs
    • /dev – udev

    So we finally will have:

    /  root as extended fs read only mounted

    /var as exteneded fs mounted read writable

    /tmp as temp fs ounted read writable

    And now to the tricks. We need to take care about /etc as there are some files which need special preparation:

    adjtime – should be linked to somewhere beyond /var; /etc/init.d/hwclockfirst.sh and hwclock.sh should be adjusted to show the option –noadjtime


    blkid.tab – should be linked to somewhere beyond /var; the environement variable BLKID_FILE must be set to  /var/local/blkid.tab in /etc/environment


    mtab – Create a symlink from /etc/mtab to /proc/self/mounts


    network/run – ifupdown links /etc/network/run to /dev/shm/network in postinst if /dev/shm exists and /etc/network/run does not; my installation was not successful without an existing network/run/ifstates, so I copied the complete directory once the network was up and running.


    nologin – This should already be a symlink to /var/lib/initscripts/nologin


    resolv.conf – no problem with static nameserver configurations


    passwd, shadow – may be modified by user interaction


    apt-get could be modified to remount before installing anything:

    DPkg {
        // Auto re-mounting of a readonly /
        Pre-Invoke { "mount -o remount,rw /"; };
        Post-Invoke { "test ${NO_APT_REMOUNT:-no} = yes || mount -o remount,ro / || true"; };
    };
    
    Use lsof to find processes blocking the readonly mount.
    
    
    There are some additional tricks to check:
    
    • reduce swappiness in /proc/sys/vm/swappiness
    • enable laptop mode
    • reduce cache writeback time /proc/sys/vm/dirty_writeback_centisecs and dirty_expire_centisecs
    • filesystem relatime
    • reduce syslog file syncing by putting a “-” in front of the syslog lines
     

    android-x86

    USB install:
    zcat android-x86-….img.gz |dd of=/dev/sdb

    How to wake up:
    the following keys are working: ESC, Menu, left, right, up, down

    to wake up the machine the keys must be pressed for at least one second

    you may use the mouse wheel to unlock the screen

    if you encounter graphics problems you may use the following options:

    kernel initrd=/initrd.img root=/dev/ram0
    androidboot_hardware=generic_x86 acpi_sleep=s3_bios,s3_mode video=-16 SRC=DATA=DPI=240

    the parameter xforcevesa enables VESA graphics driver for X

    nomodeset disables the kernel mode setting

    Both options may be used to play around and getting graphics to work.

    Navigation:
    HOME – windows key left
    BACK – ESC
    MENU – menu-key

    no KMS to enable hibernate on Thinkpad with Radeon graphic

    I had severe problems in getting my Thinkpad with Radeon 9100 graphics card to hibernate. But after some weeks of googling around I found to disable KMS to solve the problem.
    To disbale KMS I either used:
    boot command: nomodeset or radeon.modeset=0 or a modprobe option like:
    /etc/modprobe.d/radeon_KMS.conf with contents:
    options radeon modeset=0

    I also found some instructions about disabling DRI which did not do the job but I append them for showing blacklisting of modules:

    /etc/modprobe.d/DRI.conf with contents blacklist DRI
    There might also exist a file called blacklist.conf alternatively which should include: blacklist DRI

    depmod -ae
    update_initramfs -u -k ‘uname -r’ -v to also disable DRI in initial ramdisk.
    reboot and lsmod|grep DRI

    Tine 2.0 Setup

    To enable SMTP and IMAP support in Tine 2.0 the following points must be followed:

    • enable system account in the setup (Systemkonto verwenden)
    • the login name and password must be identical in Tine as well as on the email server

    The setup of Tine 2.0 itself is straight forward and following the general installation guide.

    updating uboot on the dockstar

    I copied the installation instructions and files from the wonderful website of Jeff Doozan who made an excellent job at:
    http://jeff.doozan.com/debian/uboot/
    by copying the installation script and executying.
    cd /tmp
    wget http://jeff.doozan.com/debian/uboot/install_uboot_mtd0.sh
    chmod +x install_uboot_mtd0.sh
    ./install_uboot_mtd0.sh